Back in January 2020, I decided to replace my Dewalt 745, and after a lot of thoughts, I bought another jobsite saw instead of a fancy (and very expensive) sliding saw, mostly because I spend most of my time remodeling houses and not making furniture.
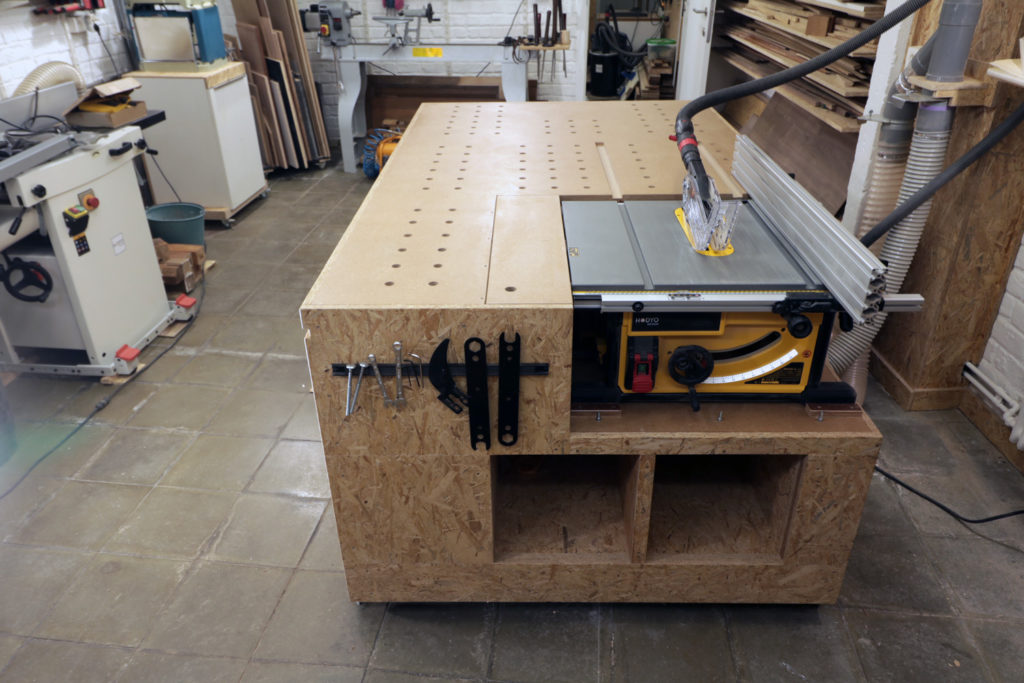
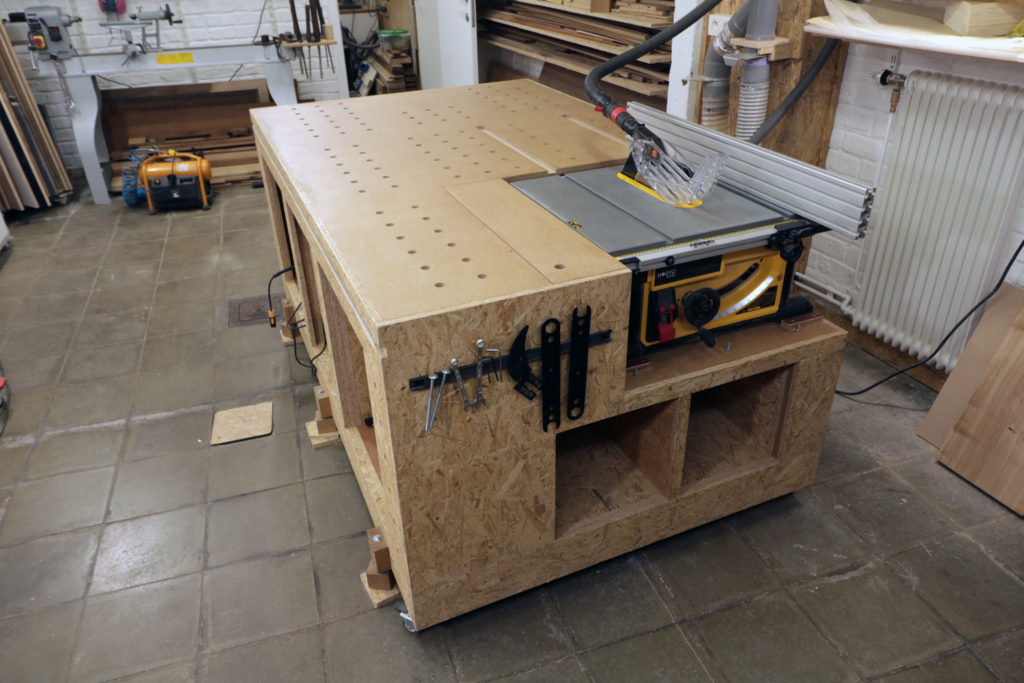
As I do really working with the DW745, I stuck to Dewalt and bought their DWE7492 saw, mostly for its largely improved rip capacity.
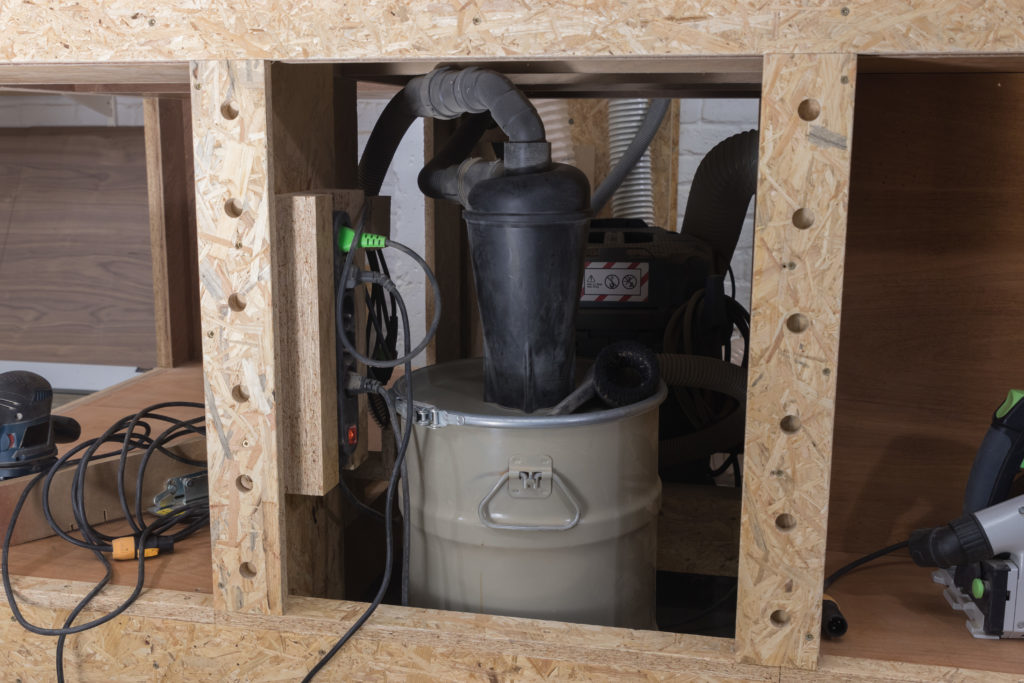
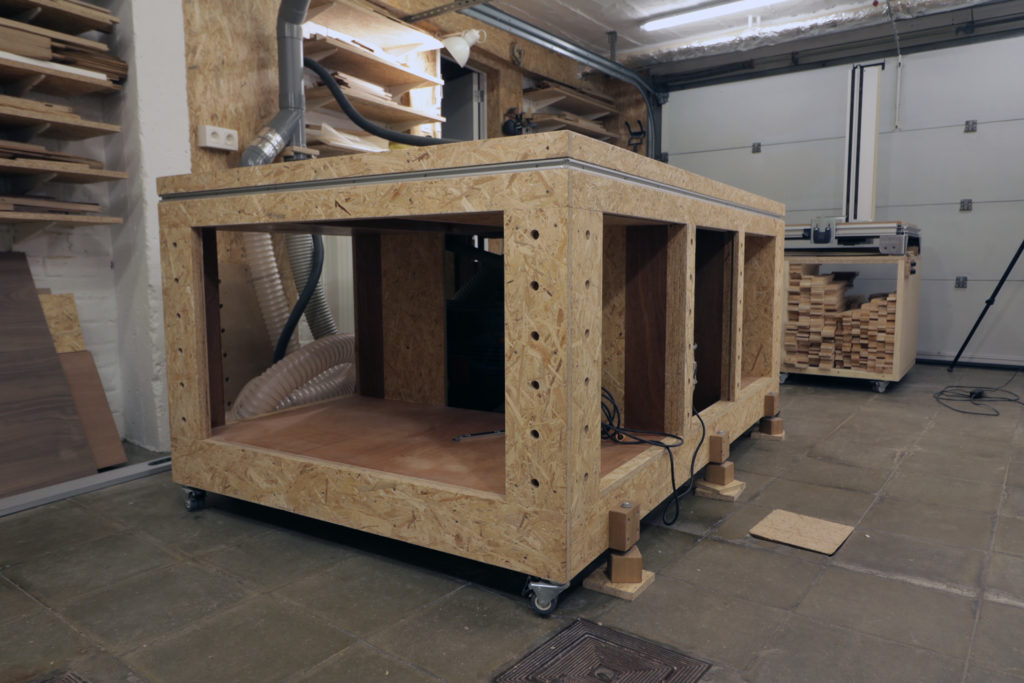
And because I work now in a much bigger workshop, I decided to replace my small table saw station with a much bigger multifunction workbench.
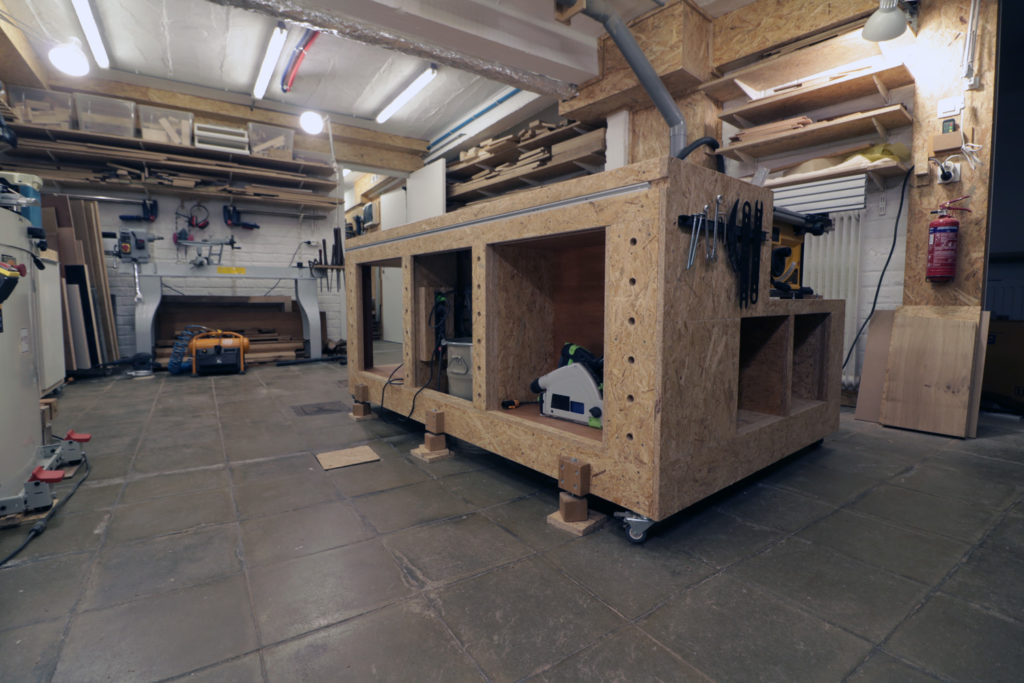
As usual, I had a couple ideas in mind but no plan, so I bought a couple 4×8 sheets of plywood for the frame and one 4×8 sheet of MDF for the top, and I started building it on the go.
I quickly realized that I would need more materials to build the workbench the way I wanted, and I ended using a few extra 2×8 sheets of OSB and some scrape wood I had laying around in the shop.
Unlike my previous table saw stand, I wanted to be able to easily remove the table saw from the workbench, so that I can bring it on site.
Here’s what I came up with.

Two weeks of work, lots of issues and mistakes to deal with, but in the end, I definitely call this project a success!

Dimensions:
Length: 203.6cm – 80″
Width: 125.6cm – 49 1/2″
Height: 94cm – 37″
Materials used for this build:
- 2 x 4’x8′ sheets of plywood
- 4 x 2’x8′ sheets of OSB
- 1 4’x8′ sheet of MDF
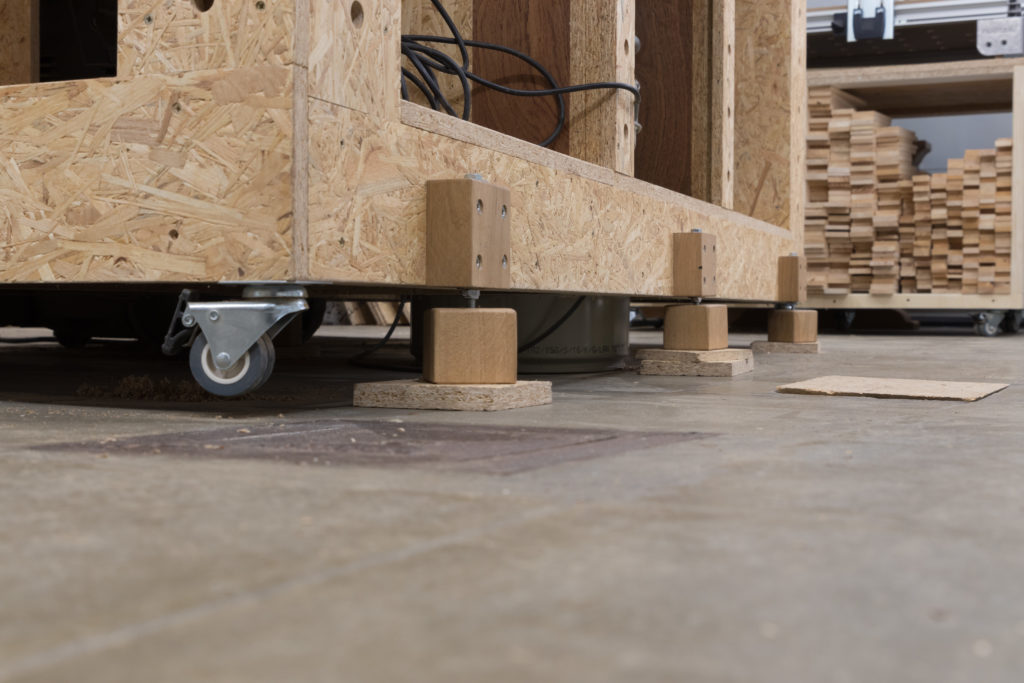
- 4 heavy duty casters
- some plywood scrap
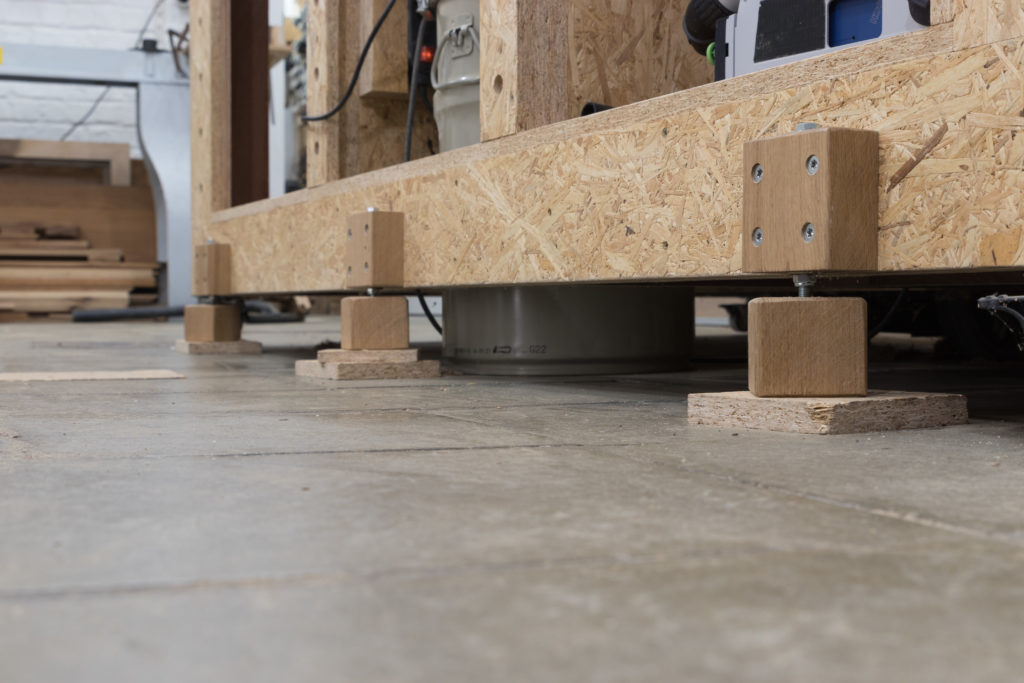
- solid oak scrap for the 7 leveling feet
- 7 M8 bolts (12cm – 4″)
- 14 washers
- 7 M8 locking nuts
- 14 M8 hexdrive threaded inserts
- wood glue for the legs
- 2 T-Tracks (125.6cm – 49″ 1/2 + 200cm – 78″3/4) from Motedis ((select language in the upper right corner of the page to select your country)
and a lot of screws!
Total cost: around 230€ (in Belgium)
Edit:
Auxiliary (30x120L I-type slot 6 profile) aluminium fence from Motedis (select language in the upper right corner of the page to select your country).
That’s a thing of great beauty. Well done.
Well done.
Very inpressed with the build
Thank you!
Linda bancada de trabalho,vou fazer uma semelhante.parabens
bellissima ingegnosa e molto funzionale
esiste un PDF PER QUESTO PRGETTO?
Hi, very impressive build, and all improvised! Could you share what you used to finish the table-top with? I guess it’s not just some oil… Thanks in advance.
Hi there
Nice project with lots of Inspiration!
Maybe you can add here pictures with dimensions or Plans ?
Greetings
Great job, I am just about to pick up my new Dewalt table saw and this is just what I was looking for. Thank you.
Looks amazingI I just upgraded to the same deWalt table saw and I have no regrets. Do you have the plans for the workbench available by any chance? This is the exact sort of thing I’m hoping to build for my saw.
TY and my apologies for my late reply! I built this workbench on the fly, so I’m afraid I have no plans available.